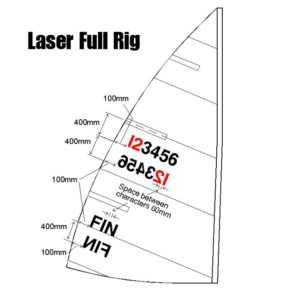
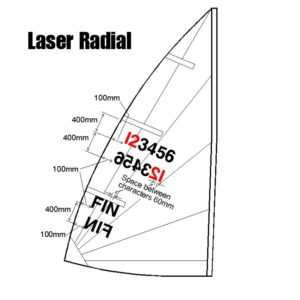
How to Number an ILCA 6 and 7 Dinghy Sail
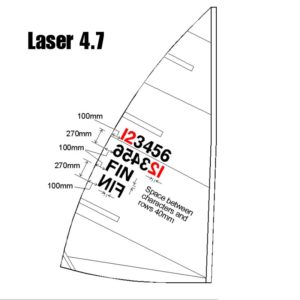
The First 2 numbers are always Red and the rest are Black or Blue, for ILCA 4 refer to the Laser 4.7 Photo Above as the measurements are slightly different, ILCA 6 and 7 are the same measurements
- Spread the sail out on a clean, dry and flat surface with the starboard side (right side facing forward) facing up.
- Measure 100 mm from the leech and 400 mm from the center of the middle batten pocket and make a small pencil mark.
- Measure 400 mm from the fore most end of the middle batten pocket and make a small pencil mark.
- Connect the two marks with a ruler or yardstick and lightly mark the baseline with a pencil.
- Peel the backing partially off the first number and line it up on the baseline, then stick it to the sail, make sure the number is applied flat without any bubbles or wrinkles, use your hands to press out any deformations or peel the number back if there are any large bubbles or wrinkles.
- Measure 60 mm from the base and top of the first number and make a small pencil mark.
- Repeat step 5 and 6, if you make a mistake don’t worry you can carefully peel the numbers back off and fix any mistakes.
- Flip the sail over on it’s port side and Measure 100 mm from the leech and 800 mm from the center of the middle batten pocket.
- Measure 800 mm fromt the fore most end of the middle batten pocket and make a small pencil mark
- Connect the two marks with a ruler or yardstick and lightly mark the baseline with a pencil.
- Repeat steps 5 and 6